
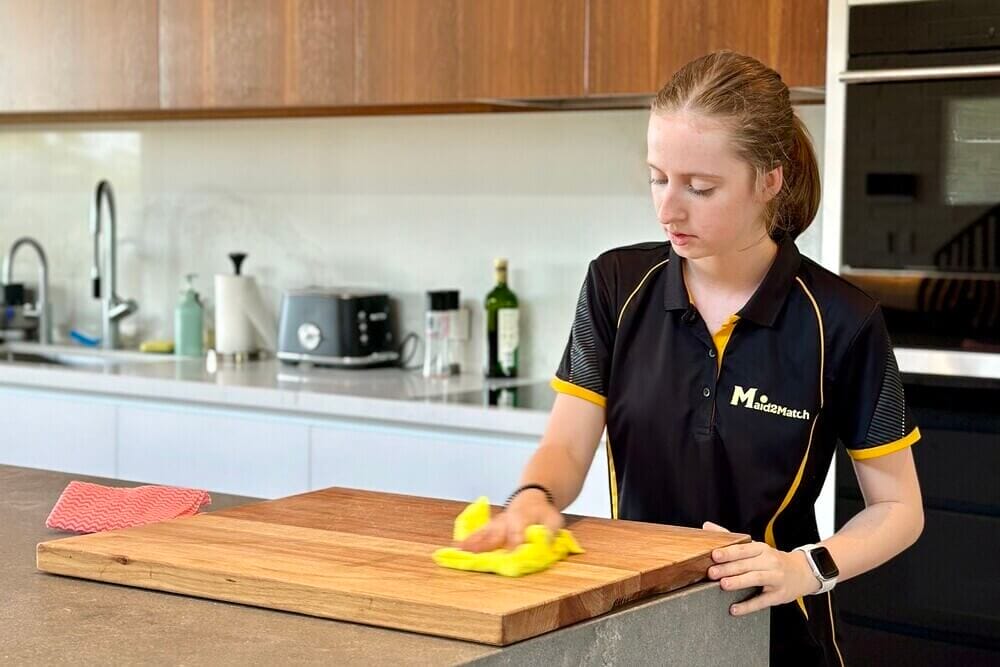
Your kitchen sees plenty of spills, stains, splotches, you name it. From meal prep to dirty dishes, things can get messy quickly.
The kitchen is the “heart” of your home, so you want it full of yummy smells and tasty meals. No one wants to cook on a dirty stove or spend an hour hunting down one jar in the cabinets!
But how to clean the kitchen and where to even start? This step-by-step guide shows you what to clean, how to clean it, and how often — daily, weekly, or monthly.
Then, after all that kitchen cleaning, reward yourself with a delicious feast. It’ll taste even better thanks to your hard work!
Proper Way to Clean | Before Cleaning | Daily Routine | Weekly Routine | Deep Cleaning Routine | Disinfecting | After Cleaning
Quick Kitchen Cleaning Checklist
If you’ve only got 30 minutes to tidy up, here’s a quick list of tasks to follow:
- Declutter and wipe the benchtop
- Put dirty dishes, pans, and other cookware in the dishwasher
- Wash the sink quickly with soap and water
- Empty the rubbish bins and replace fresh bin liners
- Sweep or vacuum the floor
You can also refer to this handy kitchen cleaning checklist or save a copy for your convenience.
How Often to Clean a Kitchen
Kitchen cleaning can be divided into daily, weekly, and monthly tasks! This table will help you keep track of chores and group them into manageable chunks.
Too many chores to keep up with, or just need a break from scrubbing? We’ll take care of everything, top to bottom, when you book a full kitchen cleaning service with Maid2Match.
| HOW OFTEN | CLEANING TASKS |
| Daily cleaning |
|
| Weekly cleaning |
|
| Monthly or every few months |
|
What is the Proper Way of Cleaning the Kitchen?
First of all, don’t overwhelm yourself! Work in zones, not by task. Instead of, say, wiping everything across the kitchen, tackle one area (e.g. the stove and splashback) before moving to the next.
That reduces how much you’re moving around and makes it easier to stay on task, since you’re not constantly doubling back or getting distracted.
When asking what order to clean the kitchen, going top to bottom and back to front is the most effective and efficient method!
| ORDER | HOW IT WORKS | NOTES |
| Top to bottom | Start with the uppermost spaces in the room, then work your way downwards. That way, dust and debris don’t fall onto already-cleaned surfaces. | For example, if you’re tackling the cabinet and benchtop area, you’d tackle the top of the cabinets first, then the cabinets themselves, followed by the benchtop, and lastly the space underneath. |
| Back to front | Similar to working top to bottom, working back to front lets you clean more effectively. This applies to both individual items and entire rooms! | Begin with the back of the kitchen and work your way towards the entryway, or from one side to the other with open-plan homes. For appliances (like ovens), tackle the back part first, then sides, then door or front. |
| Dry before wet | Sweep, vacuum, or dust before you apply any liquids. Spraying something on a dusty surface creates a grimy residue that won’t clean anything. | Follow the top-to-bottom, back-to-front rule while dusting! Otherwise, you’ll just be moving debris around. |
When you do apply liquid cleaners, be mindful of the dwell time. Wiping immediately doesn’t give the product time to break down dirt and grease. Most cleaners need 2–10 minutes of contact time to work.
Before Cleaning Your Kitchen: What to Remember

Fortunately, you can clean your kitchen with things already in the kitchen!
Mild, versatile cleaners like dish soap, baking soda, and white vinegar are effective, as is an all-purpose cleaner (like our favourite eco-friendly ones).
What to use when cleaning kitchens
Your cleaning solution will depend on what you’re tackling, but many people use:
| CLEANER | HOW TO USE | BEST FOR… |
| Dish soap | A few drops of dish soap in warm water | General cleaning on most materials |
| Baking soda | Paste of 3 parts baking soda, 1 part water | Tackling food stains and stubborn dirt |
| White vinegar | Equal parts vinegar and water | General cleaning and removing water spots |
| Rubbing alcohol | Undiluted | Disinfecting surfaces |
| All-purpose cleaner | According to package instructions | General cleaning |
Since these are all multi-purpose, they can tackle different surfaces, so you need fewer products overall. Just be sure your chosen cleaner is compatible with the material it’s applied to!
Other equipment you’ll need:
- Paper towels
- Flat or spin mop
- Soft microfibre cloths
- Non-abrasive sponges
- A good vacuum cleaner
- Bucket and spray bottle
- Soft-bristled scrubbing brush
Be sure to use separate cloths for different jobs. That prevents you from mixing cleaning products or moving dirt around. And don’t forget to rinse cloths and sponges regularly!
What not to use for kitchen cleaning
Avoid harsh chemicals like bleach, since these can often strip the finish from materials or leave a harmful residue. Ammonia is an exception, as it has some uses, like cleaning stove grates.
Skip highly-abrasive cleaners such as steel wool, which could scratch or scuff finishes. Food debris and dirt may then get trapped there, leading to mould or bacteria.
Keep acidic cleaners (including vinegar and citrus-based products) away from natural stone, wood, unsealed grout, and aluminium. The acid can cause etching or pitting.
Do not mix cleaning products, especially anything with ammonia, bleach, or vinegar — these can react to create toxic gases.
Lastly, try not to use coloured or patterned cloths on light surfaces! The dye might transfer onto things like benchtops and grout, especially when wet.
Preparing to clean your kitchen
While getting ready to put in some elbow grease, here are a few kitchen cleaning tips!
Don’t try to do everything at once, especially if you’re planning to deep clean. Prioritise tasks based on what you have time for and what’s most urgent.
One trick is to schedule 1–2 big tasks in one area alongside several smaller ones. If you want to clean the oven, tackle the stove top and splashback as well, then mop the floors afterwards.
Gather all your cleaning materials so you have them all on hand. This way, you’re not constantly pausing to find a sponge or bottle of vinegar.
While working, wear protective gear like rubber gloves to keep safe. Open the windows or switch on the exhaust so the space is well-ventilated.
Lastly, switch off and unplug appliances before cleaning. If just used, wait for them to cool down first.
Removing Stains in the Kitchen
Kitchens are notorious hotspots for stains, from spilled sauces to oil splatter. Here’s a quick rundown of different stain removal methods you can use as you work!
Always start by removing any solids, then blot the liquid with a paper towel.
| STAIN | CLEAN WITH |
| Coffee, tea, and wine | Wash with soap and water if fresh; apply baking soda paste if dried |
| Grease/oil | Sprinkle baking soda or cornflour to absorb, then wash the area with dish detergent |
| Hard water/mineral deposits | Spray with equal parts white vinegar and water and wipe away |
| Rust | Scrub with a cut lemon sprinkled with salt, or use a dedicated rust remover |
| Stubborn or coloured food stains | Paste of 2 parts baking soda and 1 part hydrogen peroxide |
Everyday Kitchen Cleaning Routine

The goal of light, daily cleaning is to minimise dirt buildup and make the eventual deep cleaning easier! It also lets you catch messes and other problems ASAP.
Your routine will be a combo of spot cleaning as you go and tidying up at the end of the day.
- Clean up food messes ASAP
- Wash dirty dishes and wipe the table after meals
- Wipe appliances like the toaster and air fryer
- Tidy up clutter on benchtops and shelves
- Vacuum or sweep the floors at least once a day
- Wipe down the benchtop and other exposed surfaces
- Empty the rubbish bin to prevent pests and mould
- Wash the sink and faucet with hot, soapy water at the end of each day
For appliances like the oven or stovetop, wipe them down after use to lessen grease and grime.
When wiping and spot cleaning, use a soft microfibre cloth and a compatible all-purpose cleaner or dish soap and warm water.
After handling raw meat — especially chicken — wash and disinfect the sink straight away. 70% isopropyl alcohol works fine for most sinks and needs at least 1 minute (but ideally 3 minutes) of contact to work.
Weekly Kitchen Cleaning Routine
This section covers cleaning chores you’ll do at least once a week. They’re not as intensive as deep cleaning, but more thorough than daily tasks.
Wash the dishwasher filter

| What to clean with | Soap and water |
The filter is the unsung hero of your dishwasher. It traps food debris, grease, and detergent residue that gets washed off with every dish load.
Since that gunk builds up pretty quick, you need to clean the dishwasher filter regularly! A clogged filter can prevent the tub from draining or even lead to mould and damage.
Soak the filter in hot, soapy water for 10–15 minutes. Use a soft brush (like an old toothbrush) or sponge to scrub gently, then rinse the filter and let it air dry.
Clean the stove top

Keep your stove safe and hygienic by wiping it with a damp cloth after every use (or at the end of the day). Then deep clean the stove top once a week with a solution appropriate for your stove type:
| TYPE OF STOVE | CLEANER | TIPS |
| Electric stovetop | Dish detergent and water | Minimise the moisture used around the electric coils |
| Glass cooktop | Dish detergent and water or white vinegar | Remove crumbs and debris beforehand so they don’t scuff the glass surface |
| Induction cooktop | Equal parts white vinegar and water | Dry the induction surface thoroughly after cleaning so you don’t leave water spots |
| Stainless steel stove | Dish detergent and water | Wipe with the grain to prevent scuffs or streaks |
Work with the stove shut off and cooled down so you don’t get hurt or burn the cleaning solution. Unplug the stove or shut off the gas valve if possible.
Don’t forget to clean the stove grates, burner caps, and any knobs or buttons! Use a microfibre cloth to wipe surfaces clean and a soft brush to scrub any stubborn dirt.
Wipe the splashback

| What to clean with | Soapy water, commercial degreaser, or stone-safe cleaner |
Splashbacks see a lot of grease and grime, especially if you cook regularly. Like the stove, wipe it quickly after each use and give it a more thorough clean weekly.
For both glass and tile splashbacks, soapy water should be enough for everyday grime. In cases of heavier buildup, try a commercial degreaser.
For stone splashbacks, opt for mild soap or a stone-safe cleaning product.
Tackle the grout lines with an old toothbrush or grout brush, then wipe off residue with a dampened cloth.
Clean small appliances

There are several small workhorses in your kitchen, from the coffee maker to the microwave. Weekly light cleaning helps keep them in good condition!
| APPLIANCE | CLEANER | TIPS |
| Air fryer | Wash in soap and water, then dry. | For baked-on debris, soak the basket in hot water for 10–15 minutes first. |
| Coffee maker | Follow the manufacturer’s instructions, especially if the appliance needs backflushing. | For a French press, just wash it with some warm, soapy water. |
| Kettle | Wash in soap and water, and dry immediately to prevent water spots. | Don’t submerge an electric kettle — just wipe the exterior so you don’t get the heating element wet! |
| Microwave | Put 2 tbsp of vinegar in a microwave-safe bowl of water, then run on high for 2–3 minutes. Wipe the inside with a soft cloth. | If you don’t like the scent of vinegar, put half a lemon in the bowl instead. |
| Slow cooker | Wait until the slow cooker has fully cooled, then soak the pot insert in hot water and soap for 10–15 minutes. Scrub with a soft sponge afterwards before rinsing. For the exterior, wipe with a damp cloth. | Check the manual if the pot insert is dishwasher-safe for easier cleaning. |
| Toaster | Remove crumbs and debris from inside, then wipe the exterior. Wash the crumb tray in soapy water. | You can use a pastry brush to get any crumbs between the slats! |
For stainless steel appliances, you can use diluted white vinegar or a dedicated stainless cleaner. Then polish the exterior with a few drops of olive oil and a soft cloth.
To remove stuck-on food or stubborn stains, apply a paste of 2 parts baking soda and 1 part water. Wait a few minutes before working the stain off with a damp sponge, then wipe away the residue.
Tidy the kitchen cabinets

No need to take out the contents and get into all the corners for routine kitchen cabinet cleaning!
Your focus will be on the exteriors, so choose your cleaner according to the material:
| CABINET TYPE | CLEANER | TIPS |
| High-gloss or polyurethane cabinets | Diluted white vinegar | Wipe in one direction or with the grain to prevent streaks |
| Laminate cabinets | Mild dish detergent and water | Avoid using too much water so you don’t warp the laminate or leave spots |
| Metal cabinets | Dish detergent or stainless steel cleaner | Use gentle pressure and work with the grain, then polish afterwards |
| Painted cabinets | Mild soap and water | Avoid abrasive cleaners that can scuff or chip the paint |
| Wood cabinets | Oil-based wood cleaner | Minimise the moisture used to avoid warping or mould |
Don’t forget to wipe the handles or knobs, and thoroughly dry the cabinets to prevent water stains or rust.
If tackling kitchen cabinets above the stove, use a good kitchen degreaser or a citrus-based cleaner.
Dust and wipe kitchen surfaces

| What to clean with | All-purpose cleaner |
After lightly cleaning appliances and cabinets, tackle the remaining kitchen surfaces, especially benchtops.
Again, start with the uppermost spaces and go from one side to the other, working your way downwards.
Dust the light fixtures and ceiling, especially the corners! Go over the tops of floating cabinets as well.
For benchtops, brush off dust and crumbs, then put away stray items. Quickly wipe the surface with an all-purpose cleaner or, for stone benchtops, a stone-safe product.
Don’t forget to wipe the dish rack and wash any drip trays underneath!
If there are mineral deposits from hard water on the rack or benchtop, spray the area with a mix of equal parts vinegar and water. Wait 1–2 minutes and wipe the deposits away.
Wash the sink and drain

In addition to daily washing, deep clean the kitchen sink and drain once a week!
Use a solution compatible with your sink’s material:
| MATERIAL | CLEANER | TIPS |
| Acrylic | Soap and water | For yellowing acrylic, try rubbing the surface with a cloth dampened in white vinegar |
| Ceramic or porcelain | Equal parts vinegar and water | Avoid letting the vinegar solution sit for more than 5 minutes to prevent etching |
| Granite | pH-neutral soap or stone cleaner | Stick to pH-neutral or stone-safe cleaners so you don’t damage the finish |
| Quartz | Mild dish soap and water | A thin paste of baking soda and water helps remove stains, since it’s only mildly abrasive |
| Stainless steel | Soap and water | Wipe with the grain and avoid highly abrasive cleaners |
For the drain, boil equal parts vinegar and water in a kettle. Slowly pour the mixture down the drain, pausing every so often so it can dissolve any buildup inside.
Fully dry the sink afterwards so you don’t leave water spots.
Clean the rubbish bins

| What to clean with | Rubbing alcohol |
Rubbish bins can attract pests or develop mould and bacteria — all hazards in a kitchen. Empty them regularly and sanitise them at least once a week.
Use the crevice attachment of your vacuum cleaner to suck out loose debris from the bottom of the bins. Then spray all the surfaces (inside and out) with rubbing alcohol or commercial disinfectant.
Let the solution sit for at least a minute before wiping the bin clean and replacing the liner.
Vacuum and mop the floors

| What to clean with | Tile cleaner |
Last but not least, it’s time to vacuum and mop the floors.
Sweep or vacuum to remove loose dirt, or use a dust mop on wood floors. Get into the space beneath large appliances and furniture, such as the fridge.
Once that’s done, move on to mopping. For tiled floors, use a good tile cleaner or a mix of 1/4 cup dish soap per 3 litres of water.
For kitchens with hardwood flooring, opt for a damp mop and mild soap or a wood floor cleaner. Keep water to a minimum so moisture doesn’t seep into the floorboards.
Go over the floors with a clean, dry mop to remove excess moisture and let the whole kitchen air dry.
How to Deep Clean a Kitchen
There are your most intensive cleaning chores, which can take an hour or more.
But kitchen deep cleaning keeps things (especially appliances) hygienic and in good condition.
Clean the dishwasher

| How often to clean | Once a month |
| What to clean with | Dish soap or dishwasher cleaner |
Much as we wish otherwise, dishwashers aren’t self-cleaning. Food debris, soap scum, and mineral deposits accumulate over time.
A dirty dishwasher might not clean the dishes properly, and could lead to unpleasant odours or mould.
When deep cleaning the dishwasher, start by removing the rack, spray arms, and filter. Wash these separately with hot, soapy water.
Remove visible debris from the dishwasher drain before flushing it with hot water (not boiling). Afterwards, scrub the interior and gasket with water, dish detergent, and a soft sponge.
Wipe the exterior with an all-purpose cleaner or equal parts vinegar and water.
You can also use a commercial dishwasher cleaner or check if your model has a self-cleaning cycle.
Scrub floor tiles and grout
| How often to clean | Once a month |
| What to clean with | Baking soda paste or grout cleaner |
Besides mopping the kitchen tiles weekly, you should scrub the grout lines once a month! Dirty grout can make even the cleanest tiles look less pristine.
Choose a good grout cleaner that’s safe for the tile material, or make a paste of 2 parts baking soda to 1 part hydrogen peroxide (plus a few drops of dish detergent).
Follow the product instructions for using the grout cleaner. If using the baking soda paste, spread it over the grout lines and let it sit for 5–10 minutes before scrubbing clean. Mop away the residue with a damp cloth as you go.
Remember to reseal your kitchen grout every 6–12 months!
Descale the kettle and filter

| How often to clean | Every 2–3 months |
| What to clean with | Vinegar, lemon juice, or citric acid |
Glass and stainless steel kettles accumulate mineral deposits and other dirt over time, even with everyday rinsing. Descaling the kettle every few months removes that buildup.
Fill your kettle halfway with one of the following:
- Equal parts water and vinegar
- Water and a few slices of lemon
- Water and 1–2 tbsp of citric acid powder
Bring the mixture to the boil, then switch off the kettle and let it sit for 3–5 minutes. Follow with a soft-bristled brush to scrub the kettle clean. Rinse it afterwards and boil some fresh water to remove any lingering taste.
For the kettle filter, soak it in some hot water and vinegar, then wash with dish detergent.
Deep clean the fridge

| How often to clean | Every 3–4 months |
| What to clean with | Dish detergent and all-purpose cleaner |
Do a quick check of your fridge every week! That lets you spot spills and messes ASAP, so they don’t make your fridge smell bad or go mouldy.
Then every few months, set aside an afternoon to thoroughly clean the fridge. Prep an esky to hold perishables and switch off or unplug the fridge before you start.
Take out all the contents and check for anything expired, spoiled, or stale — those get tossed out (or composted). Then remove the shelves and drawers to wash in soapy water after they come up to room temperature.
Clean the inside of the fridge with all-purpose cleaner and a microfibre cloth. You can follow that up with a food-safe antibacterial/disinfectant spray.
For the door gasket, use the all-purpose cleaner or some soapy water. Scrub between the folds with an old toothbrush, then dry the gasket afterwards.
Once a year, deep clean the freezer as well! After emptying the shelves, spray the surfaces generously with equal parts vinegar and water. Wait a few minutes before wiping off the dirt.
Declutter cabinets and drawers

| How often to clean | Every 3–4 months |
| What to clean with | Duster or nozzle vacuum attachment, all-purpose cleaner |
Like the fridge, it’s good to tidy up the cupboards and drawers every few months!
Take out the contents and toss anything that’s long expired or spoiled. Dented or buckled cans also need to go, as the food inside could be compromised.
Work on one cabinet or drawer at a time so you can be efficient and thorough. Once everything’s out, use a soft duster or the nozzle attachment of your vacuum to hoover up dust and debris.
Wipe all the surfaces clean with an all-purpose cleaner, including the undersides of shelves. Then fully dry the space before putting things back.
Clean the exhaust fan
| How often to clean | Every 3–6 months |
| What to clean with | Hot water and mild detergent |
Your kitchen’s exhaust fan vents out hot air and any airborne particles not captured by your rangehood. A clean fan ensures a fresh, well-ventilated space.
You can clean the exhaust fan on your own, but call an HVAC specialist to deal with the ductwork!
Use a vacuum with a crevice attachment to suck out dust and debris from the fan and cover. Afterwards, scrub off the dirt with warm, soapy water and a soft sponge.
Dry every part of the fan before reassembling.
Tackle the rangehood

| How often to clean | Filter every 3 months; Rangehood every 6 months |
| What to clean with | Warm water and dish soap |
Your rangehood plays a key role in keeping your kitchen hygienic. Regular maintenance helps it work efficiently and ensure air quality while not becoming a fire hazard.
Clean the rangehood with hot water and grease-cutting dish detergent. For stainless steel rangehoods, tackle stubborn grease with Dawn Powerwash.
Avoid spraying the cleaner directly onto the rangehood so you don’t get the circuitry or wires wet! Instead, dampen a cloth or sponge with your cleaning solution and buff off the dirt.
Wash a metal rangehood filter in warm, soapy water. Charcoal filters are not washable and must be replaced every 3 months.
Deep clean the oven

| How often to clean | Every 3–6 months |
| What to clean with | Commercial oven cleaner |
Light cleaning after every use helps minimise the buildup of grease and grime in an oven. Then do more thorough oven maintenance every 3 months (or 6 months if you don’t use it much).
Start by gently heating the oven to 50ºC (122ºF) for a few minutes, so it’s easier to scrape off burnt-on food and grease. Carefully use a cooktop scraper at a 30–45º angle and wipe away debris as you go. Switch off the oven once you’re done.
Choose a good-quality oven cleaner and follow the product instructions. Do not mix it with other cleaning solutions. And always check if it’s compatible with the glass oven door!
Do not apply the oven cleaner until the appliance is shut off and fully cooled. If you’re able, unplug the oven or shut off the gas line as a safety precaution.
Lastly, clean the oven racks and oven trays as well. They can be washed in hot water and soap, or scrubbed with a thin baking soda paste.
How to Disinfect Kitchen Surfaces
For kitchen areas that touch raw food (especially raw meat or seafood), you’ll need to disinfect the surface after use. It’s also good practice to sanitise high-touch areas like handles and bin lids.
Here are a few kitchen-safe disinfectants you can use:
| DISINFECTANT | DWELL TIME | MATERIAL | TIPS |
| 70% isopropyl alcohol | At least 1 minute, but ideally 3 minutes | Non-porous materials like metal, ceramic, and sealed stone; avoid on porous materials like unsealed stone and wood | Keep away from gas or electric stoves since it’s flammable |
| 3% hydrogen peroxide | At least 5 minutes | Most materials except dark stone or wood, and metals like aluminium or stainless steel | Surfaces or items must be rinsed with clean water afterwards |
| Commercial disinfectant | Based on product instructions | Check the product label for compatibility | Check whether the product must be rinsed off for food-contact surfaces |
Wear rubber gloves while working and keep the room well-ventilated!
Always wash the surface first with soap and water, so the disinfectant makes maximum contact.
Spray on the disinfectant, then either allow it to evaporate (alcohol) or wait the appropriate time before wiping clean (all disinfectants).
Avoid using bleach as a disinfectant around the kitchen. While it can kill bacteria, it may strip protective coatings or damage materials like stainless steel and stone.
After Cleaning the Kitchen

Do a final walkthrough of your kitchen to check if you’ve missed anything. Pay close attention to corners, edges, and narrow spaces between items where dirt may linger.
Make sure all the surfaces are dry after cleaning so you avoid water spots, mineral deposits, or rust (on metal items). Then leave the windows open afterwards so the kitchen can air out.
Don’t forget to clean your supplies, too! They’ve scrubbed and wiped a lot, so they deserve some TLC.
Toss your cleaning cloths, sponges, and dish towels into the laundry with a good detergent.
If they’re heavily soiled, you can strip wash them with a homemade laundry stripper made of 1 part borax, 1 part washing soda, and 2 parts enzyme-based laundry detergent.
Rinse any brushes and disinfect them with some rubbing alcohol, then let them air dry.
Store your cleaning products and supplies properly so you know where to find them! And of course, make note of what needs refilling or replacing while it’s still fresh on your brain.
FAQs About Kitchen Cleaning

Here are a few other questions or concerns people often have about maintaining a tidy kitchen!
How often should I replace kitchen sponges?
For sponges used on dishes and cookware, aim to replace them every 2 weeks.
It’s also best to clean them, either by running them in the dishwasher or microwaving them while damp for 1 minute. Then wait for the sponge to cool before taking it out!
For cleaning sponges, you can get away with a longer timeframe — about every 3–4 weeks, or longer if you clean them regularly. Toss them in the washer with your microfibre cloths and a good enzyme detergent!
Can I clean my kitchen with vinegar and baking soda?
You can clean your kitchen with baking soda and vinegar — separately! They neutralise each other when combined, leaving you with fizzy water and salt that’s not much good for cleaning.
Stick to a baking soda paste for tackling food stains (especially grease) and vinegar for general cleaning.
Is vinegar safe for all kitchen surfaces?
Vinegar is safe for most kitchen surfaces, but there are exceptions!
Avoid vinegar on natural stone (such as marble or granite) and wood, since it can discolour or etch the finish. Do not use it on delicate metals like aluminium, either, or it could cause pitting!
Try not to use vinegar regularly in your dishwasher’s rinse cycle or while cleaning. Occasional use is fine, but repeated and prolonged exposure can dry out the gasket and degrade the material.
How do I get rid of kitchen smells naturally?
Boil a pot of water on the stove with something aromatic! Popular choices are cinnamon or coffee, but citrus peels, mint leaves, or vanilla extract also work well. And as a bonus, these help deter house flies!
For smells localised in small spaces (like inside a cabinet), place a shallow container of baking soda or coffee grounds inside to absorb the smells.
How to prevent grease buildup in the kitchen?
Around the kitchen, wipe surfaces with a damp cloth after every use. That goes for the stove, oven, splashback, and anything else that gets grease splatter.
For any spills, sprinkle baking soda or cornflour to absorb the grease and wipe away with some paper towels.
Prevent grease buildup by using splatter guards and running the rangehood while cooking!
