
How much do you love to cook?
If you’re whipping up meals regularly, your kitchen exhaust fan is probably working overtime to keep your space airy and fresh.
And with all that hard work, it’s bound to need a good scrub.
Don’t worry, cleaning it isn’t as tough as it sounds. Still, take extra care when climbing a ladder to reach your fan, especially if it’s ceiling-mounted.
Below, we’ve got a step-by-step guide on how to clean the kitchen exhaust fan — let’s dive in!
Why Clean It | Signs to Clean | How Often to Clean | Before Cleaning | Cleaning Steps | Remove Tough Grease Stains | Reassembly | Tips to Keep It Clean
Is the Kitchen Exhaust Fan the Same as the Rangehood?
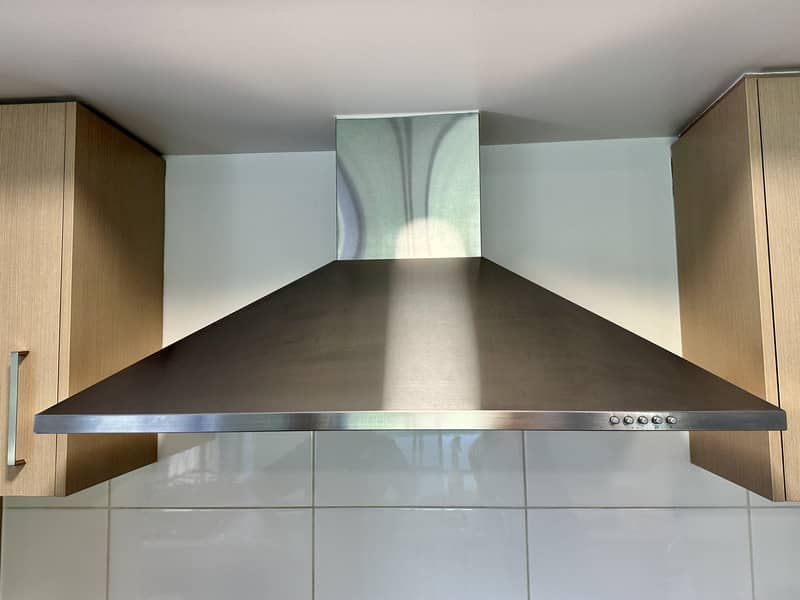
Not quite — a kitchen exhaust fan is different from a rangehood.
A rangehood is installed directly above your stovetop to draw in fumes as you cook.
It comes with a range hood filter (or grease filter) that traps particles before venting the air outside or recirculating it back into the kitchen.
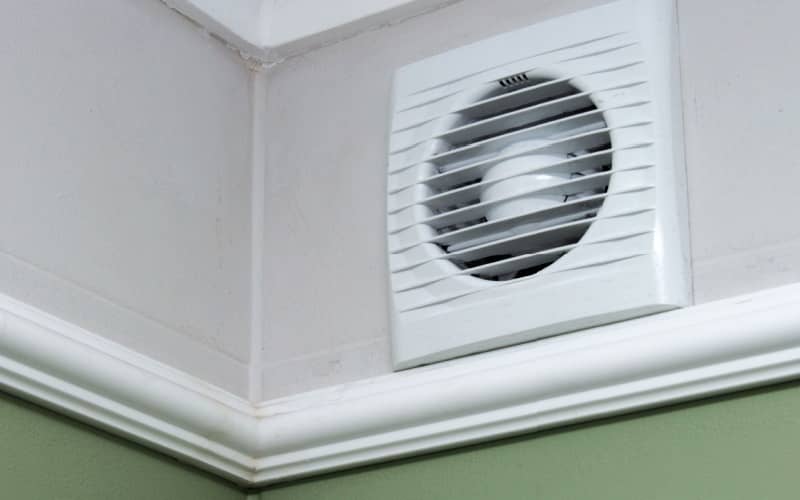
On the other hand, kitchen exhaust fans are mounted on the ceiling or wall and usually don’t have a filter.
Ceiling-mounted fans are usually ducted, while wall-mounted ones blow air straight outdoors.
Because they’re a bit farther from your stove, kitchen exhaust fans aren’t focused on stovetop smoke.
Instead, they improve the overall air quality by removing heat and odours from the kitchen.
They also reduce humidity, which helps prevent mould and mildew growth.
Do Kitchen Exhaust Fans Need to be Cleaned?
Absolutely!
Even if you’ve got a rangehood, it can’t clear all the hot, moist air produced as you cook.
That’s where the exhaust fan steps in — it helps remove leftover airborne particles.
But over time, dust, grease, and grime can build up inside the fan and create a fire hazard.
Plus, a dirty kitchen exhaust works less efficiently, making your kitchen hotter and smellier.
On the flip side, a clean exhaust fan (plus a clean rangehood) means better airflow, fresher air, and less risk of fire.
Signs That You Need to Clean the Kitchen Exhaust Fan
Does your kitchen feel stuffy or too hot? Or maybe you’ve noticed a musty smell lingering?
These could all be signs of poor airflow, possibly caused by a clogged kitchen exhaust fan.
Strange buzzing or rattling noises coming from the fan can also signal grime build-up that’s putting extra strain on the motor.
And if you spot gunk on the fan’s cover or blades, your kitchen exhaust fan’s surely begging for a good scrub!
How Often to Clean Your Kitchen Exhaust Fan
Clean your kitchen exhaust fan every 3-6 months to keep it working well.
If you’re a daily chef or love cooking up a storm, bump up your cleaning schedule to handle the extra grease!
And don’t forget the fan cover — dusting and wiping it down every month (or whenever it starts to look shabby) can make a huge difference.
As for the ductwork, cleaning it yourself can be risky as it comes with serious fire and electrical hazards.
Play it safe and call an HVAC specialist to handle the duct system once a year for optimal airflow.
Before Cleaning Your Kitchen Exhaust Fan

Before starting the cleaning process, gather your cleaning materials and take a moment to prepare for safety.
Materials you need
Here are what you’ll need to clean your kitchen exhaust fan:
- Basin
- Step ladder
- Warm water
- Microfibre cloths
- Soft-bristle brush
- Dishwashing liquid
- Non-abrasive sponge
- Baking soda (or bicarb soda)
- Vacuum with a crevice attachment
Safety precautions
If the kitchen exhaust fan is plugged into an outlet, unplug it before cleaning.
For exhaust fans that are hardwired into the electrical system, switch off the circuit breaker.
Also, read the owner’s manual for detailed instructions on how to take apart the exhaust fan safely.
If removing some parts might expose complex electrical wiring, it’s best to leave them on and clean them in place.
Lastly, wear gloves and eye protection to avoid injury from sharp edges or falling debris — particularly for ceiling-mounted kitchen exhaust fans.
Steps to Clean the Kitchen Exhaust Fan
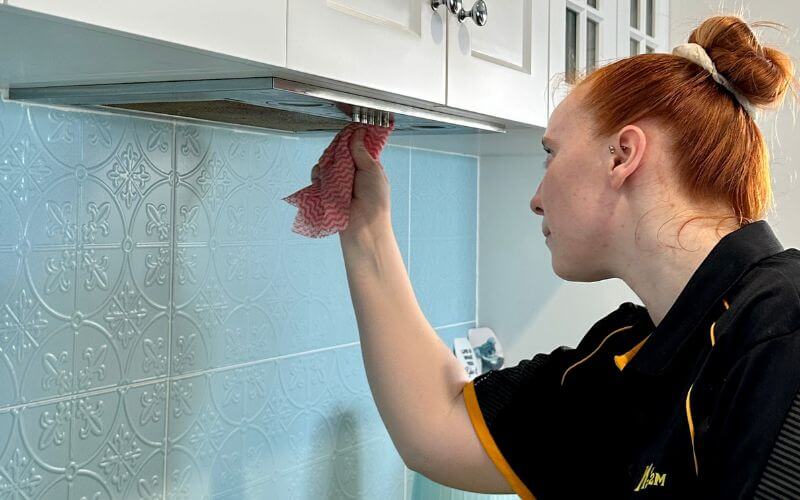
You can clean the kitchen exhaust fan while it’s still mounted. Wipe down the fan’s cover and blades or use a vacuum with a slim nozzle.
However, partial disassembly is needed to deep clean a greasy kitchen exhaust fan.
Step 1: Take apart your kitchen exhaust fan
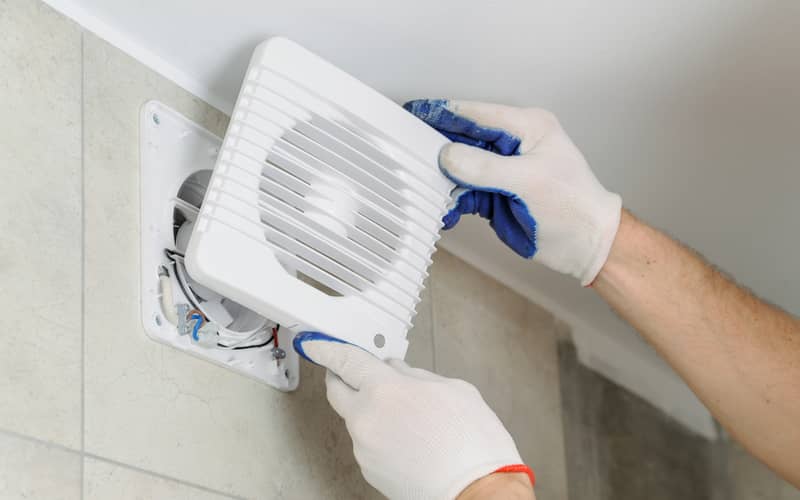
Get on a sturdy step ladder to reach the kitchen exhaust fan. Be careful while climbing!
Remove the fan’s cover (use a screwdriver if necessary), or gently pry it off if it’s clipped or snapped in place.
Next, locate the rotating component of the kitchen exhaust fan in the centre.
This could be a blade or a blower wheel, which looks like a small cylindrical drum with several curved fins. Check how it’s secured and detach it.
In some models, the blades or blower wheel could be fixed to the motor — do not remove this if the fan is hardwired into your electrical system.
Instead, only take off the fan’s cover then clean the remaining parts in place.
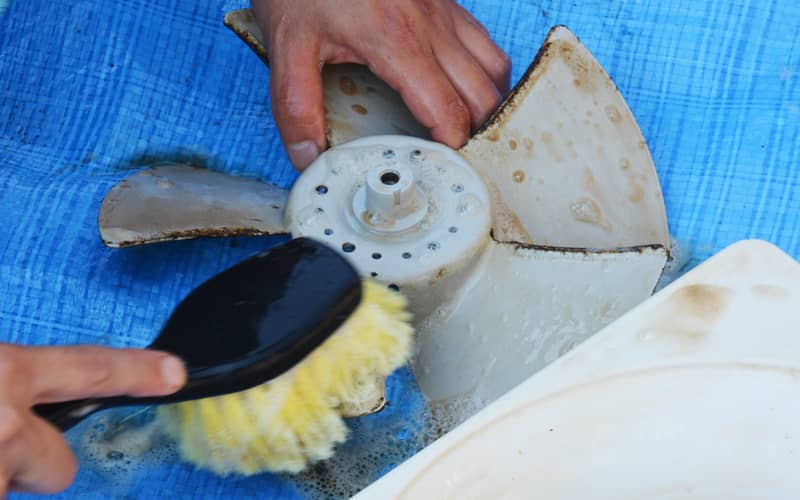
Step 2: Clean the kitchen exhaust fan’s cover and blades
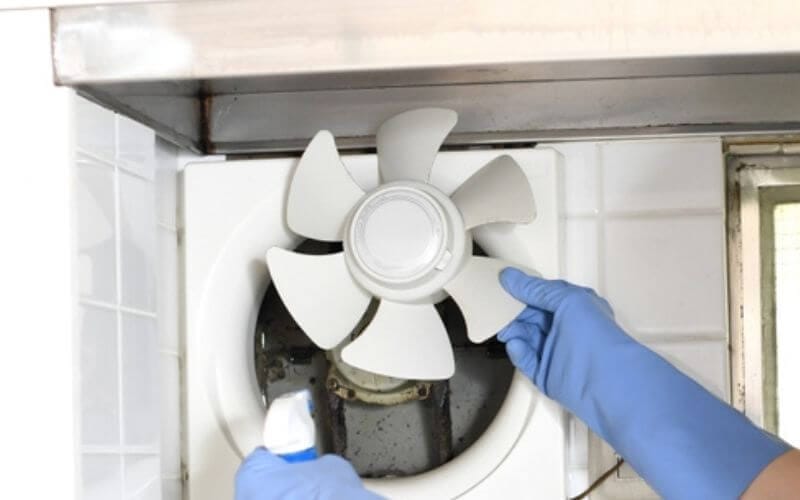
Use a vacuum with a crevice attachment to suck out the dust and debris from the exhaust fan’s cover and blades.
Next, prepare your cleaning solution. Mix warm water and dish soap in a basin. You can also sprinkle in baking soda if the parts are heavily soiled.
For plastic fans, keep the water at around 40-50°C, as overly hot water could warp or deform the material.
For any aluminum parts, be cautious with baking soda — leaving it on too long can cause discolouration.
Soak the kitchen exhaust fan’s cover and blades in your cleaning solution for 15-20 minutes to loosen any hardened stains.
Afterwards, scrub the flat surfaces with a soft sponge or cloth. Use a small nylon brush or an old toothbrush for hard-to-reach areas and tougher dirt.
Be sure to clean thoroughly along and between grooves, fins, and edges.
Once all the grime is gone, rinse thoroughly with clean water.
You can dry the parts with a soft cloth or a paper towel, then let them air-dry completely.
Step 3: Clean the kitchen exhaust fan’s interior
Prep your supplies beforehand to make things easier. You’ll need your vacuum with a crevice tool and a dry, soft cloth.
For cleaning, mix warm water with dish soap. Dip a cloth into the solution and wring it out so it’s damp, not dripping.
Bring everything with you as you climb back onto the step ladder to reach your kitchen exhaust fan.
To clean inside the kitchen extractor fan, start by vacuuming the housing to remove loose dust and debris.
If you can access the fan’s motor, vacuum it as well. Be sure to get into tight spots and corners!
Next, wipe down the interior surfaces with a damp cloth. Do not get the motor wet as you clean.
Focus on stubborn grime, and scrub until the area is spotless. When you’re done, dry everything off with a fresh cloth.
Step 4: Clean the kitchen exhaust fan’s backdraft damper
Your kitchen exhaust fan may have a backdraft damper, which stops air from flowing back into your kitchen.
The backdraft damper has flaps that open when air is being pushed out and close tightly when the fan is turned off.
For ductless fans that vent air directly outdoors, the backdraft damper is usually built into the exhaust fan so it’s easier to access. You’ll usually find this in wall-mounted fans.
If you can reach the backdraft damper, vacuum off the dust. Then, wipe it down with a damp cloth or sponge soaked in warm water and mild dish soap.
A soft-bristle brush will also help with stuck-on dirt.
Pay extra attention to the hinges, grooves, and corners, where grease and dust can gather. Once cleaned, dry the damper thoroughly.
Note: For ducted exhaust fans, the backdraft damper might be installed deeper inside the ductwork or outside your home.
These types are best cleaned by professionals during your annual duct maintenance.
Removing Tough Grease Stains From a Kitchen Exhaust Fan
Got stubborn, caked-on grease stains on your kitchen exhaust fan?
Try applying a few drops of pure dish soap (preferably grease-cutting) directly to the stains, then gently scrub the area.
But if that doesn’t work, mix baking soda with a little water to make a thick paste. Apply it straight to the grease stains, let it sit for 15-20 minutes, then scrub gently.
Alternatively, use a degreaser that’s compatible with your kitchen exhaust fan’s material. Let it sit on the stain for a few minutes, then scrub.
When you’re done, wipe off the cleaning product with a damp cloth, then follow up with a dry cloth to remove any residue.
Avoid abrasive materials like steel wool and harsh chemicals such as chlorine bleach or rubbing alcohol, as they can damage or discolour your fan.
When in doubt, spot test in a small, hidden area and read the labels carefully!
Reassembling Your Kitchen Exhaust Fan
Make sure everything is completely dry before reassembling your kitchen exhaust fan.
Reattach the fan blades (or blower wheel) and cover. Double-check that everything is properly fastened — whether with screws or clips.
Next, plug your kitchen exhaust fan back in or turn the circuit breaker back on.
Switch on the fan and listen for any unusual noises or vibrations, which may indicate something is loose or misaligned.
Lastly, hold a piece of toilet paper near the cover. If it sticks, the fan is working properly!
Tips to Keep Your Kitchen Exhaust Fan Clean for Longer
Your exhaust fan works with the rangehood to improve the air quality in your kitchen.
Clean the rangehood filter regularly to catch grease and airborne contaminants before they reach the fan.
Also, consider reaching out to professional cleaning services to keep your kitchen spotless.
A tidy space means fewer particles floating around and prevents grime build-up.
And don’t forget to book a pro to check and clean the ducts once a year — it’s one of the best ways to keep air flowing smoothly and your fan working well!