
Whether you’ve just moved into a new home, or renovated your flooring, part of maintaining your new tile floor is cleaning it. Changing your tile flooring is an easy way to give your home a swanky new look.
The biggest problem for newly-laid tiles is grout haze, but that’s easily cleaned with a little elbow grease.
Grout haze is a whitish film left on the surface of a tile after grouting. It comes from minerals leftover after laying the grout between tiles.
You can remove it with a commercial grout haze remover, or make your own out of white vinegar and warm water.
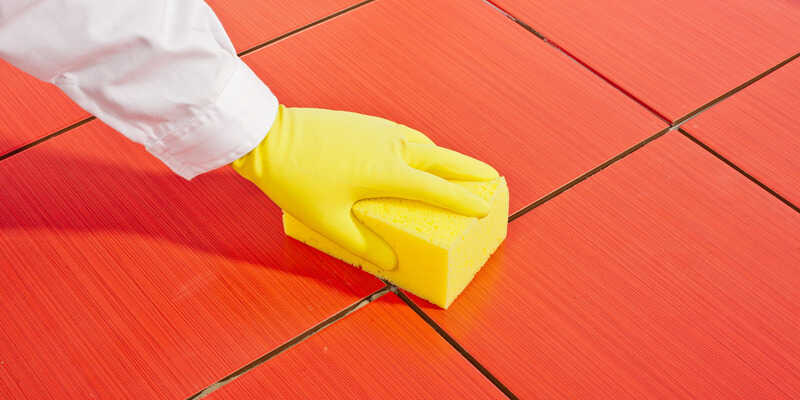
Use your chosen tile cleaning solution with a grout sponge to clean the surface of your tiles and have them sparkling.
Just laid out new tiles? Here’s how to care for new tiles after installation – and how to maintain them, too.
Grout Haze On New Tiles
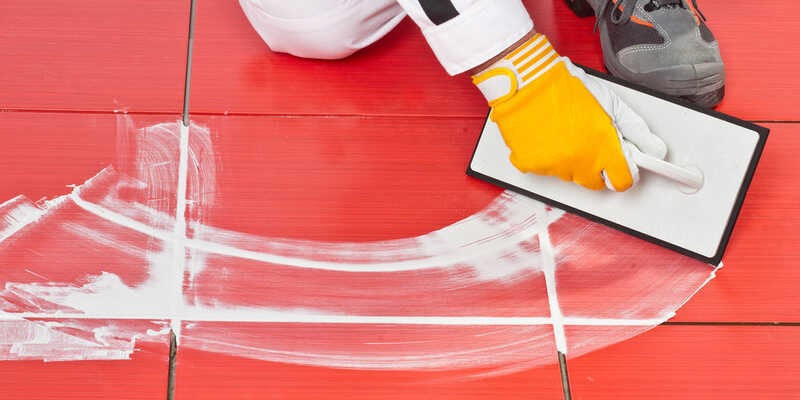
All kinds of tiles, from porcelain to terracotta, must be grouted during installation. Grouting involves using a rubber float to pull grout across the tile, which leaves residue on the surface.
This whitish film is called ‘grout haze’, and you can’t remove it with plain old water.
Grout haze remover is a special commercial cleaner, with different formulations depending on the material used in grouting. It’s much more effective at removing grout haze from a tile floor – although you can DIY your own, too!
Preparing To Remove Grout Haze
Before you clean new tiles after installation, you’ll need to wait for the grout to dry. Check with your contractor or check the grout package to see how long that will take. Just make sure it isn’t longer than ten days, or the grout haze won’t come off.
If your grout is epoxy-based, you’ll need to purchase a grout haze remover. (Don’t mix it up with a grout remover or grout cleaner!)
Make sure you know the material of your tiles. Ceramic and porcelain can handle exposure to vinegar, but stone and wood need a specific tile cleaning solution. Check whether your grout haze remover is compatible with the type of tile installed.
Purchase a grout sponge and a rubber grout float. These are important – regular household sponges won’t be able to remove grout haze as effectively!
Removing Grout Haze After Installation
To remove grout haze and clean tiles after installation, you’ll need:
- Grout sponges
- A broom or vacuum
- 2 buckets or similar containers
- A mop
- Latex or nitrile gloves
- A nylon brush
- Grout haze remover (DIY or commercial)
- Start by sweeping or vacuuming the tiles to remove any loose dust and debris. This will also help you avoid scuffing the surface of your tiles later on.
- Wear your nitrile or latex gloves, especially if you’ll be handling chemical products.
- Mix your grout haze remover with water according to the instructions on the bottle. Fill one bucket with your haze remover solution, and another with clean water.
- Dip your nylon-bristle brush into the haze remover and start to scrub the tiles. Work in small areas at a time.
- Rinse immediately after you finish a section of tile, and wipe it down with a damp grout sponge. Remember to frequently clean the sponge and replace your rinsing water. Repeat the process until your entire floor is clean.
- Let the surface dry. You can wipe it down with a dry microfibre mop to help. Then step back and admire your sparkling clean tile flooring.
DIY Grout Haze Remover
For tiles that can handle acidity, you may not need to buy haze remover! You can absolutely clean grout haze naturally. Simply mix white vinegar and warm water in a ratio according to how recently-laid your tiles are:
- If your tiles were installed within three days, mix one part vinegar to four parts water.
- If your tiles were installed within five to ten days, mix two parts vinegar to three parts water.
Dry-clean the tiles with the abrasive side of the sponge first to break up the grout. Vacuum or sweep away any dust. Then use another sponge to apply the solution onto the floor and scrub away!
Removing Tile Adhesive

If you’re doing a home job when renovating your tiles, you’ll need to know how to remove tile adhesive before installing new tiles.
For organic adhesives, using a hairdryer or hot water to soften the mastic underneath will do the trick. Otherwise, use an organic-based adhesive remover or solvent to clean the surface.
To remove the adhesive from old tiles, simply soak in hot water for a few hours. Then use a metal scraper to remove the softened glue from the surface.
Just be careful not to damage the ceramic (or other material), and get all of it off – you can’t reuse a tile that has leftover adhesive!
Keeping Tile Floors Clean
Frequent cleaning
After you’ve installed your new tiles, it’s important to maintain them! That involves regular cleaning – dry cleaning (by using a vacuum or broom), wet cleaning (with a mop), and deep cleaning tiles.
Doing this keeps your floor looking tidy, and extends their lifespan. Just don’t break your tile by accident – that’ll take more than just cleaning.
(Of course, if that feels like too much effort – or you want to give your knees a break – a home cleaning service can take care of your tiles for you!)
Don’t skip the grout
Your tiles may be clean, but if you skip over scrubbing your tile grout, your floor will still look dirty and unattractive.
The porous nature of grout means it absorbs grease and grime easily, so don’t forget to scrub it down every once in a while.
Cleaning grout is easy! Just combine bicarb soda and clean water in a paste, then apply the cleaning solution along the grout lines.
Let it sit for a few hours or overnight, then scrub with a stiff nylon brush. Seal afterwards to protect your grout.
No abrasive cleaners
Use nylon brushes or old toothbrushes to clean tiles, and don’t use any abrasive cleaner. Doing so will scratch the surface of your tiles – and that’s not something you can clean away.