
Did you just move into a new house and didn’t like the decorating choices? Or maybe you feel like redecorating your current home to spruce things up.
Maybe some of your tiles are broken, or maybe you’ve got some old pieces you’d like to reuse.
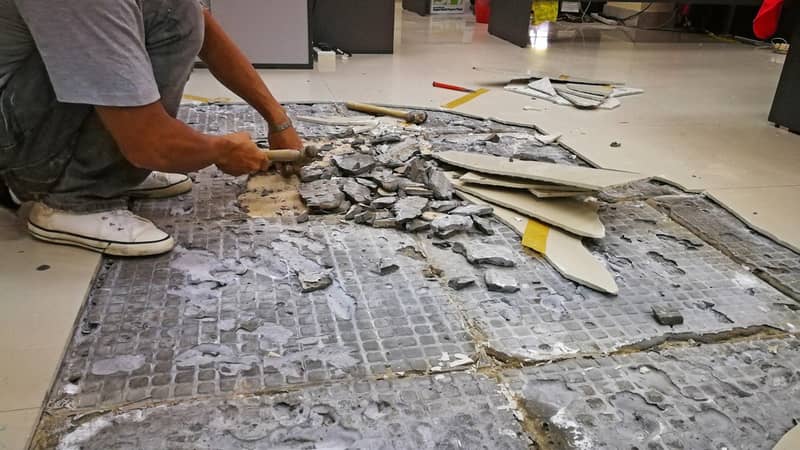
Whatever the reason, you now find yourself needing to know how to remove tile adhesive.
There are several ways to tackle this task, depending on the type of adhesive and the tools available. When removing tile adhesive, you can:
- Use a hair dryer
- Pour or soak in hot or boiling water
- Apply a tile adhesive remover
- Work with a steamer
Tile adhesives are stubborn materials, since they are meant to fix tiles to a surface.
So get ready to put in more elbow grease – especially since you can’t reuse the tiling or install new ones until the old tile adhesive is gone!
Why Remove Tile Adhesive?
There are generally two reasons to remove glue from tiles or floors:
- You need to re-tile or install new tiles
- You’re reusing old tiles
When re-tiling, it’s essential to remove all the old adhesive. Otherwise, you won’t have a flat surface to work with since the glue will create uneven sections.
The same goes for any old tile pieces – any old glue still stuck to the surface will make it impossible to install correctly.
Types of Tile Adhesive
Tile adhesive or glue is the substance bonding a tile to the underlying material, such as a concrete floor or wall. The adhesive ensures the tiles remain firmly in place.
If you’re going the DIY route, you can either buy pre-mixed adhesive or a powder that you mix yourself.
Thin-set mortar
This is the most common type of adhesive, since it works on most materials (including ceramic, porcelain, and stone).
There are two types of thinset mortar:
- Unmodified (sand, cement, and water-retention ingredients)
- Modified (unmodified mortar mixed with liquid latex polymers)
Thin-set mortar is moisture-resistant and generally mould-resistant. It’s also heatproof, so it won’t expand or contract easily.
Mastic glue
Unlike mortar-based adhesive, mastic is made from acrylic. It comes pre-mixed and is very workable, so it’s perfect for a home job. Moreover, it’s easy to remove.
On the other hand, mastic isn’t recommended for floors – it’s better for wall areas such as the kitchen backsplash. It also won’t work for heavier tiling.
Moreover, mastic isn’t that water-resistant, so you can’t use it in high-moisture spaces like a bathroom.
Epoxy
Epoxy adhesive usually doesn’t come pre-mixed, so you’ll need to combine the components yourself. It creates a stronger bond and resists staining.
Additionally, epoxy is water-resistant and does not need additives to prevent cracking.
However, applying epoxy might be a more difficult job since it cures so quickly. It also costs more than other adhesive materials.
Before You Remove Tile Adhesive
Prepare the surface and space before starting to work! Remove furniture and possessions from the room, or use protective sheets as covers. These will collect any fallen residue and other debris.
(Of course, you can always call in a professional home cleaner to clean up once the tiling has settled!)
Always exercise caution when removing tile glue! Use protective equipment such as rubber gloves, a face mask, and goggles.
Wipe the surface with a damp cloth to clean off any dirt and debris before letting it dry. You can also soak a few cloths in warm water, then leave them on the surface to soften the adhesive before removal.
How to Remove Floor Tile Adhesive
Note that these methods only apply to porcelain or ceramic tiles, and concrete or plasterboard wall material. For natural stone tiles and similar materials, you’ll need to consult a professional.
For ceramic tiles and similar materials, use one of the following methods to remove adhesive from the floor:
- Hair dryer
- Hot or boiling water
- Adhesive removing product (citric acid or soy base)
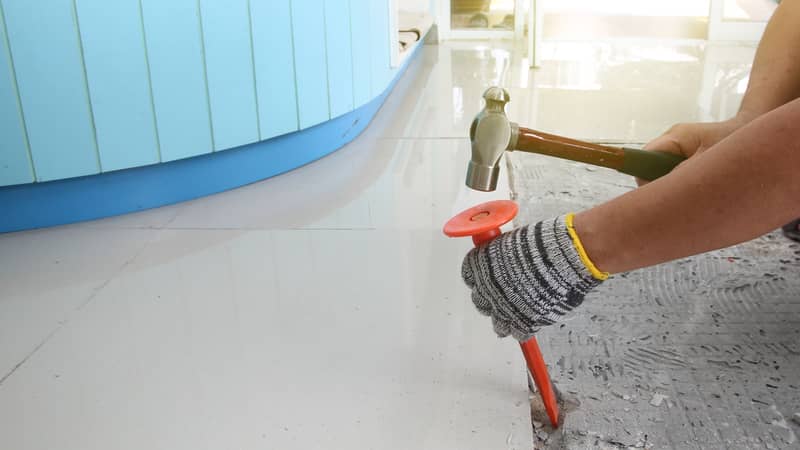
1. Remove the adhesive with a hairdryer
If you only need to remove adhesive from a small area, or you’re working with an organic adhesive, try this method!
You’ll need:
- A hairdryer (heat guns will work too)
- Handheld scraping tool or chisel (the knife of a multi-tool will also work)
Switch on the hairdryer and aim it at the floor tiles. Move it slowly across the tiling so that the mastic or mortar softens.
Go back to your starting point and focus on the same spot for a few minutes. Switch off the hairdryer and take your chisel or scraper.
Insert the tip into the joint and wiggle it until you can pry the corner from the subfloor. Gently loosen then remove the tile.
For more stubborn materials, opt for the pry bar.
Once you’ve removed all the tiling, use the hairdryer to remove tile adhesive. Go over the remaining residue with the heat then scrape it off.
Smooth out and clean the subfloor once you’ve finished.
2. Remove the adhesive with hot water
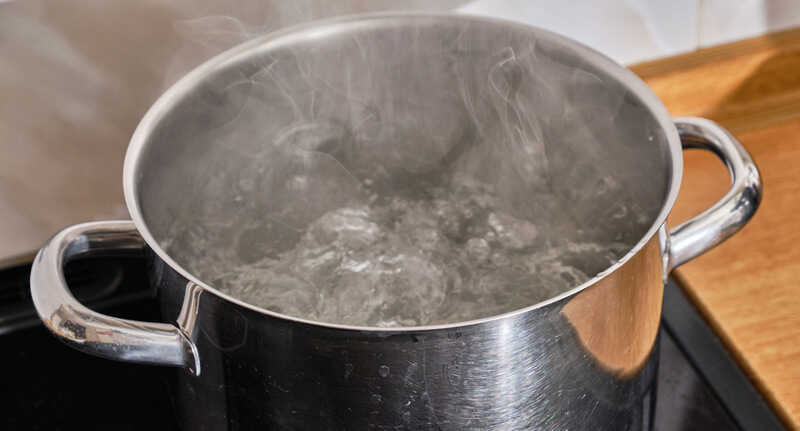
This is the preferable method for flooring that uses mastic adhesive. However, it’s not recommended for a large area since working with hot water could be impractical or dangerous.
Do not use this method near electrical outlets or in areas with wires on the floor.
You’ll need:
- A large pot of just-boiled water
- A handheld scraper or chisel
Pour the just-boiled water onto the target section of the tiling. The heat and liquid will soften the adhesive underneath.
Insert the chisel or scraper into the joint and pry the tile off the subfloor. Repeat until you’ve cleared the floor area.
If you’re struggling, you can pour a small amount of the water onto the area to further loosen the adhesive. Alternatively, soak a cloth in the hot water then squeeze it onto the stubborn spot.
Pour more heated water over the remaining tile glue and scrape it off.
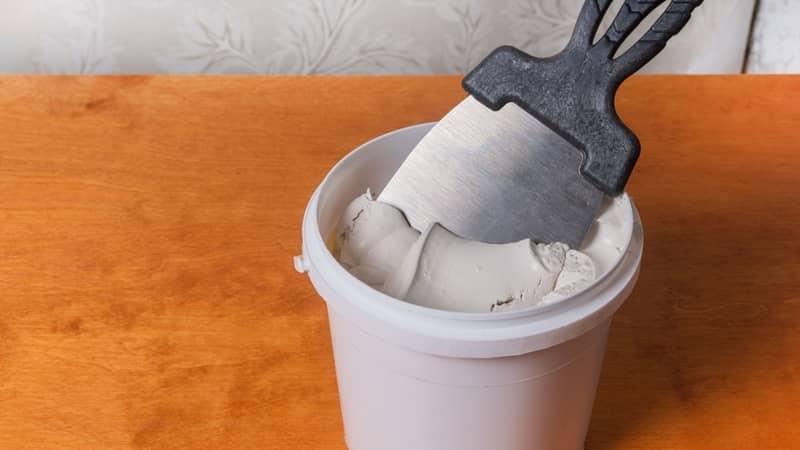
3. Use commercial tile adhesive removers
This way is the most straightforward and works best on adhesives that are not water-soluble. Opt for a product with a citric acid or soy base since these are less hazardous and require less ventilation.
First, use the hairdryer or boiling water method to remove the old tiles.
Once the floor area is clear, test your tile adhesive remover on an inconspicuous section. This will ensure there are no adverse effects on the subfloor material.
Spread your adhesive removal product over the whole subfloor area. You’ll need about 1 litre of solvent for every 3 square metres (or check the instructions).
Let the tile glue remover sit for at least 15 minutes to achieve the desired results. Check the floor every few minutes to see how much the adhesive has softened.
When soft enough, remove the adhesive using a scraper or chisel.
In cases where the adhesive is stubborn, you can apply another coat of remover, or gently break off the hardened glue with a hammer and chisel.
Never leave the paste on too long or it may re-harden and make removal more difficult.
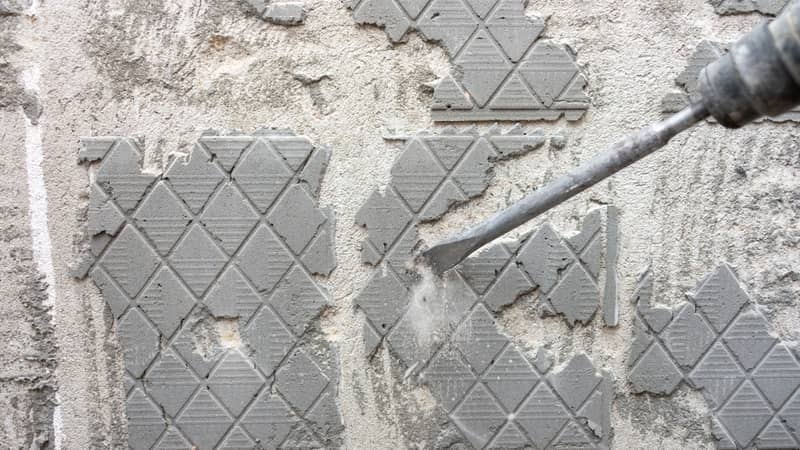
How to Remove Tile Adhesive from Walls
A hairdryer will also work to remove glue from tiles on the wall. You can use an adhesive-removing paste.
Two other methods to get adhesive off your walls include hot water and a steamer.
If removing adhesive from walls, make sure to lay down plastic sheets on the floor to collect the debris.
1. Removing wall tile adhesive with hot water
You’ll need:
- A pail of hot water
- Clean soft cloth
- A scraper or chisel
Dip the cloth into the hot liquid and use it to soak the adhesive. You may need to go over the glue a few times to loosen it enough.
Scrape off the adhesive gently. Repeat the process until all glue is removed, then clean up afterwards.
2. Removing wall tile adhesive with a steamer
The steaming method works better on cement, since the steam could damage material such as plasterboard.
You’ll need:
- A wallpaper steamer (also called a wallpaper stripper)
- A scraper or chisel
Switch on the steamer and point it towards the wall, beginning in one corner. Work in small areas so the adhesive doesn’t re-harden after you move to the next section.
Don’t let the steamer sit for too long or you might damage the tiles.
Use a chisel or scraper to gently pry the glue off. Repeat until all the adhesive is removed.
How to Remove Old Tile Adhesive
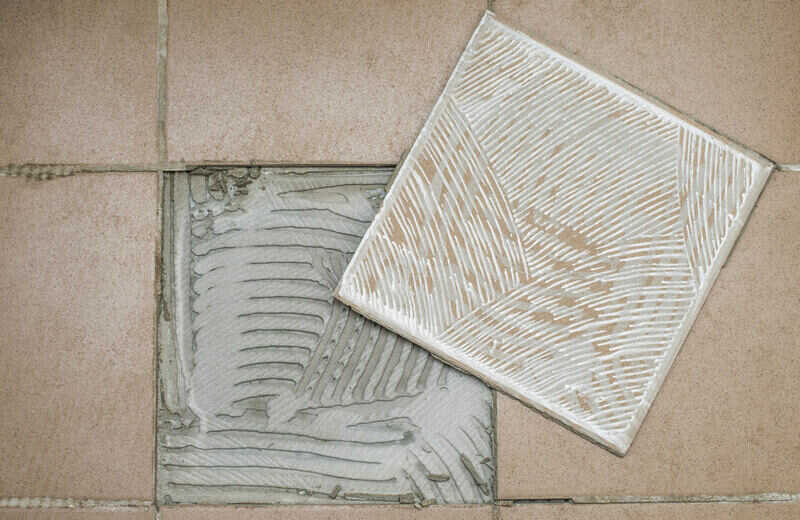
For tiles that have leftover adhesive stuck to the underside, you can still clean them! There are a few simple methods, but this is the easiest.
Place your old tiles in a bucket or other sizable container. Fill it with hot water until all the tiles are submerged.
Leave the pieces to sit for 1–2 hours so the water can dissolve the adhesive.
Take the tiles out then use a metal scraper to remove the softened glue. Be mindful not to damage the material underneath.
Repeat until each piece is clean.
Maintain Tiles Following Adhesive Removal
After removing adhesive from tile or from surfaces, you’ll need to do some clean-up! Sweep or vacuum away any residue scattered on the floor, then do a quick wet mop.
Let the surface fully dry before doing further work.
Even after you remove tile adhesive, you may need to have your wall or floor skimmed to smooth it over before re-tiling. For walls, you may also need to have them replastered.
You’ll need to clean tiles after installation! This may involve removing grout haze, as your tiling might look scuffed or chalky.
And of course, clean your tile floor or wall regularly to extend its longevity and maintain its appearance. You’ll also need to clean the grout or your tiling will still look dirty.
And keep the tile adhesive remover handy – you never know when something will break, or when you’ll decide that you want a whole new look!