
Ugly, black stains on grout lines can instantly ruin a freshly cleaned room.
You could spend all afternoon scrubbing your entire shower, yet any remaining dark patches between your tiles would still make the space feel unhygienic.
Don’t blame mould right away, though. While it’s common in bathrooms and other damp spaces, it’s not the only thing that darkens grout. The culprit may also be bacteria, grease, mineral buildup, or even how you mop.
The good news is that most black stains on grout can be fixed!
For fungal issues, 3% hydrogen peroxide is usually the best option, but other causes need different treatments.
In this guide, we explain how to clean grout that has turned black and prevent it from coming back.
Before Cleaning Blackened Grout | How to Clean Black Stains on Grout | When Cleaning Doesn’t Work | Prevention Tips
Why Is My Grout Turning Black?
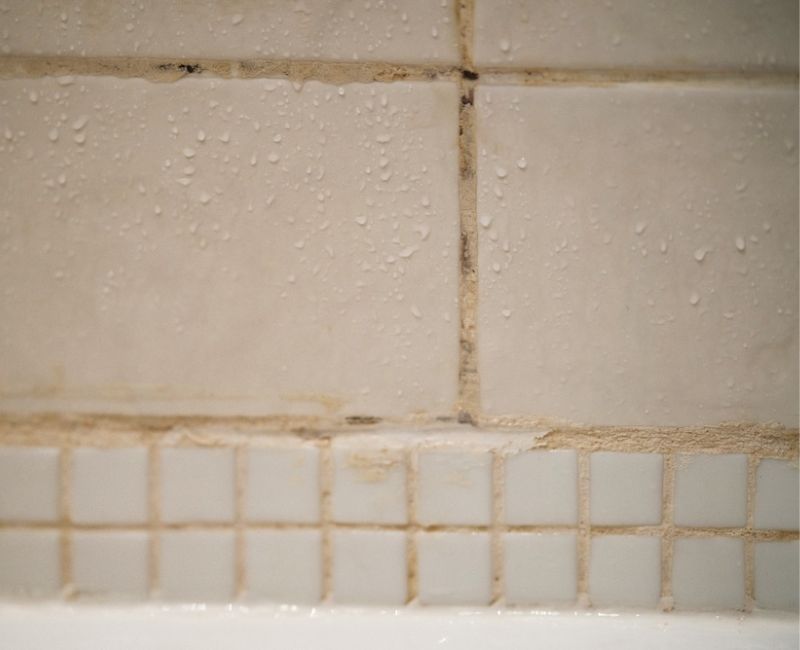
Grout — especially if it’s cement-based or unsealed — is porous.
It absorbs moisture, dirt, and residue, making it prone to stubborn dark patches.
To clean blackened grout lines, identify first the type of stain you’re dealing with, so you can choose the most effective treatment.
Mould and mildew
When grout in the shower turns black, the most common reason is mould and mildew.
The same problem can also happen in the kitchen or laundry area, or any space with excessive moisture and limited airflow.
Mould and mildew are both types of fungus. They feed on organic residue like body oils, dead skin cells, soap scum, or grease.
However, they behave differently, which affects how hard they are to clean.
Mould is usually more stubborn. It looks fuzzy and has tiny roots that penetrate deep into porous surfaces. If you scrub it off and a faint dark mark remains, that’s actually mould living deeper inside the grout.
Mildew, on the other hand, shows up as black dots or patches on grout. It’s easier to wipe away since it stays on the surface.
More often than not, both may be present if it’s been a while since you scrubbed the grout.
Hotspots for mould and mildew:
- Near the base of toilets
- Around shower drains
- Shower floors, walls, and corners
- Around kitchen and bathroom sinks
Bacteria
Black stains on grout may also be caused by a bacterium called Serratia marcescens. Like mould, it thrives in humid spaces and feeds on the fatty residues of shampoo or soap.
People even call it ‘pink mould’ because it starts as slimy pink or orange stains on grout lines.
Over time, that bacterial buildup attracts dirt and turns grey or black, which is why you might mistake it for fungal growth.
Fortunately, it’s easier to clean than mould, since it just sits on the grout surface.
Hotspots for bacteria:
- Shower floors and walls
- Built-in shower shelves
- Around shower drains
Grease buildup
Seeing black grout lines on your kitchen splashback? That’s likely due to grease splatters from cooking!
Fresh grease stains usually look yellow or brown. But since they’re sticky, they act like a magnet for floating dust and dirt.
Any trapped debris eventually hardens and turns the grout grey or black.
That oily layer can also become a breeding ground for mould and mildew, especially in poorly ventilated kitchens.
Where grease usually builds up:
- Kitchen splashback
- Near the stovetop or rangehood
Dirty mop water
If all grout lines in a room have turned black — not just in damp corners — your mopping habits might be the cause.
Grout lines are slightly lower than floor tiles, so excess water naturally collects in those narrow gaps when you mop.
When you don’t change the rinse water enough, that dirty water settles into the porous grout and leaves behind a dark residue.
Over time, each round of mopping adds to the buildup, making the lines look darker and darker.
Where the residue usually builds up:
- Any room that’s regularly mopped
- High-traffic floors (entryways, living rooms, or kitchens)
Hard water stains
Hard water can leave dark-coloured mineral deposits on grout lines. When grout absorbs water, it eventually dries out, but any mineral content usually remains behind.
Rust (a form of iron) is one of the biggest causes. It’s usually orange or brown, but they might appear grey or black in tight spaces where there’s not much oxygen.
Manganese is another culprit (although less common), since it usually turns dark once it oxidises.
To check if the black stain on your grout is caused by hard water, drop some vinegar (or lemon juice) on a tiny spot. If it lightens after a minute or two, it’s likely a mineral deposit.
Where mineral deposits usually build up:
- Around taps, showerheads, and sinks
- Near areas with visible limescale (chalky white deposits)
Before Cleaning Grout that Has Turned Black
Before getting started, make sure you’re set up safely and not using any cleaner that could damage grout or tiles.
Is black mould in grout dangerous?
It can be, but there’s no need to panic!
When people think of “black mould,” they usually mean the Stachybotrys chartarum fungus. This species is toxic and typically grows on surfaces that have been waterlogged for a long time.
However, black spots in shower grout are usually not this particular mould.
In most cases, you might be dealing with common household fungi like Aspergillus or Cladosporium. They’re usually black or dark green and are less harmful.
Even so, they can still affect your health. Mould spores can spread through the air and cause allergies or asthma attacks, most commonly in children, older people, or those with weaker immune systems.
That’s why it’s important to clean grout lines regularly, especially in bathrooms and kitchens. And of course, it’s worth gearing up properly before you work!
Safety precautions
Never start scrubbing black grout without protecting your respiratory system, skin, and eyes.
If you suspect mould, mildew, or bacteria, wear an N95 mask — a typical surgical mask won’t keep out fine airborne particles. Then pop on safety goggles and rubber gloves.
Proper ventilation is essential as well. In enclosed spaces like the shower, switch on the exhaust fan and leave it running while you clean. Opening a window also improves air circulation.
Do not scrub your grout dry, particularly if you see any mould (fuzzy growth) or mildew (black dots or patches). Dry scrubbing sends mould spores into the air!
Always wet the area or apply your chosen cleaning solution to trap the spores before you scrub.
What not to use when cleaning grout
Skip harsh chemicals like ammonia, chlorine bleach, and hydrochloric acid. Using these too often will weaken grout and make it brittle. They can also strip the sealant, so grout becomes more prone to staining.
Be cautious with acidic solutions, like citric acid, lemon juice, or white vinegar, especially when cleaning unsealed grout. Only use them as a last resort, and don’t leave them on the surface too long.
Keep in mind that any grout cleaner you use will get onto the surrounding tiles.
Ceramic and porcelain tiles are durable, so they tolerate most household products. However, natural stone tiles are easily damaged by highly acidic or highly alkaline cleaners.
Avoid abrasive tools like steel wool or brushes with metal bristles. They’ll wear down the grout over time and even scratch your tiles.
Always test your method on a small, hidden area first to make sure it won’t cause any issues!
How to Clean Grout That Has Turned Black
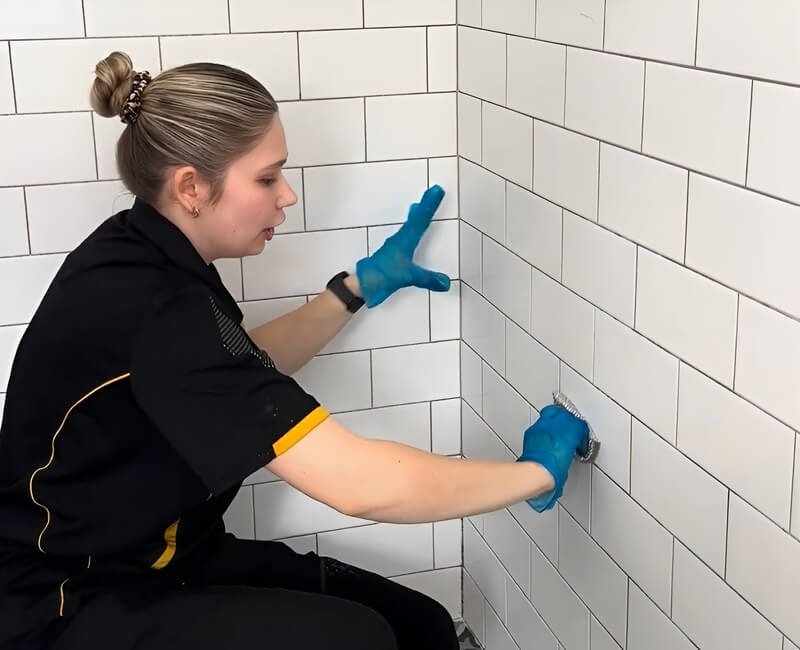
There are several ways to clean blackened grout. But you may need to try a couple of methods, particularly when dealing with mixed grime, like grease plus mould.
For scrubbing, the right tool is a dedicated grout brush or a stiff-bristle nylon brush. Keep some microfibre cloths handy, too.
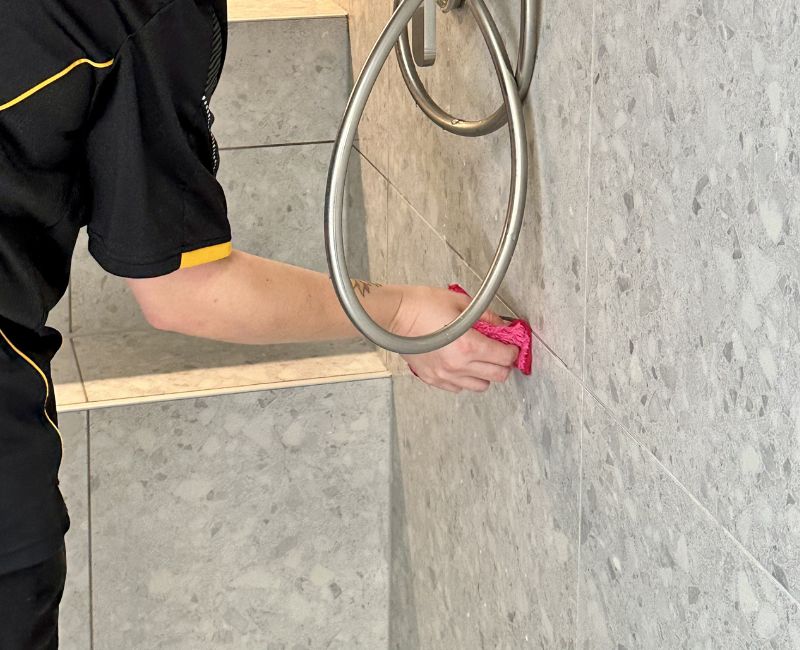
Prefer a chore-free weekend? Let a professional domestic cleaner deep clean your bathroom and shower — grout included!
Option 1. Hydrogen peroxide
Best for: Mould and mildew, bacteria, dirty mop water
Less effective on: Grease, mineral deposits
Hydrogen peroxide is a powerful cleaner that removes black mould from grout. It also kills most bacteria on contact.
A 3% peroxide solution is already effective on its own. But you can combine it with dish soap or bicarb soda to make a more powerful DIY grout cleaner:
| WHAT TO USE | WORKS ON |
| 3% hydrogen peroxide + a few drops of dish soap | Grout stains on vertical surfaces |
| 1 part 3% hydrogen peroxide + 2 parts bicarb soda | Mixed grime like soap scum with mould |
NOTE: Only mix what you need, and do not store peroxide and bicarb soda in an airtight container. Pressure can build up and cause the container to burst.
Apply the solution or paste directly onto the black marks. Wait for 10–15 minutes to give it time to work.
For lighter stains, you can clean the grout without scrubbing. Just go straight to rinsing with clean water or a damp microfibre cloth.
For heavily stained grout, some elbow grease is needed! Firmly scrub the buildup with a stiff-bristle brush, then rinse and wipe the area dry.
Option 2. Borax
Best for: Mildew, mould, grease, and dirty mop water
Less effective on: Bacteria, mineral deposits
Borax is a natural mineral that kills mould. Because it’s highly alkaline (pH around 9.3), it disrupts the acidic conditions that mould needs to survive. It also pulls moisture out of grout and dehydrates fungal roots.
Mix 3 parts borax with 1 part water. Add some dish soap, especially if there’s grease involved.
You may need to adjust the thickness of the paste depending on what you’re cleaning. A toothpaste-like consistency is more concentrated, so it’s ideal for tough buildup. Plus, it clings better to vertical grout, like on splashbacks or walls.
Apply the paste with a sponge or brush. Let it sit for about 15 minutes so it can penetrate the grout.
Use a grout brush for scrubbing, then rinse with running water or a damp rag. Wipe the grout dry afterwards.
Option 3. Bicarb soda
Best for: Grease, general grime
Less effective on: Mildew, mould, bacteria, mineral deposits
Bicarb soda is a mild abrasive and a gentle alkaline cleaner (pH around 8.3). It’s one of the safest options for natural stone tiles like marble, travertine, or terrazzo, since it won’t etch the surface.
Mix bicarb soda with a little water to create a thick paste. For greasy buildup, add a squirt of dish soap.
Spread the paste over the stained grout. Wait for 10–15 minutes before brushing away the residue.
Rinse off the residue with a damp towel, then dry the grout with a separate cloth.
Option 4. Washing soda
Best for: Dirty mop water, grease buildup, mould (if mixed with hydrogen peroxide)
Less effective on: Bacteria, mineral deposits
Washing soda is highly alkaline (pH around 11), making it more potent than bicarb soda. It’s especially effective on grease and grime from dirty mop water.
You can also mix it with hydrogen peroxide to tackle grease plus mould.
Here’s how to clean black stains on grout with washing soda:
| WHAT TO USE | WORKS ON |
| 3:1 parts washing soda and water | Light grease or general stains |
| 3:1 parts washing soda and water + a few drops of dish soap | Stubborn grease or grime |
| 3:1 parts washing soda and 3% hydrogen peroxide | Grease and mould |
Apply your washing soda paste onto the grout lines, then let it stay there for 10 minutes to loosen the buildup.
Scrub well, and remove all residue with a damp cloth. Wipe the grout dry once it’s clean.
Option 5. White vinegar
Best for: Mineral deposits
Less effective on: Mildew, mould, bacteria
Vinegar is an excellent chelating agent, meaning it can break down mineral deposits on grout — including rust and manganese!
But since vinegar is acidic, treat it as a last resort. Only use it if gentler methods didn’t work and you’re confident that the dark staining is caused by hard water.
Keep in mind that vinegar can strip grout sealer, so you might need to reseal afterwards.
| WHAT TO USE | WORKS ON |
| 1:3 vinegar and warm water | New or light buildup |
| 1:1 vinegar and warm water | Old or heavy stains |
Saturate the stains on your grout and let the solution sit for about 5 minutes. Firmly scrub the area.
Afterwards, don’t just wipe the vinegar away. Flush the grout lines thoroughly with plain water — use a showerhead or a spray bottle. This helps rinse out any vinegar that may have soaked deeper into the grout.
Wipe up the excess moisture with a clean rag and let the grout dry completely.
Option 6. Citric acid
Best for: Mineral deposits
Less effective on: Mildew, mould, bacteria
Citric acid works similarly to vinegar, minus the strong sour smell!
Dilute citric acid before applying it:
| WHAT TO USE | WORKS ON |
| 1 tbsp citric acid powder per 2 cups warm water (roughly 5% strength) | Fresh or light stains |
| 1 tbsp citric acid per 1 cup warm water (about 10% strength) | Thick or tough buildup |
Apply the solution onto the tile grout, and leave it for no longer than 5 minutes.
Use a stiff nylon brush to dislodge the mineral deposits, then wipe away the residue with a damp cloth.
To rinse, use running water or spray the area generously with plain water. Dry the grout with a clean rag.
Option 7. Commercial grout cleaners
If DIY methods aren’t cutting it, a specialised grout cleaner may do the job.
Choose a product designed for the specific type of staining. Some target mould and mildew, while others are formulated for grease or hard water minerals.
You’ll also find pH-neutral grout cleaners designed for natural stone tiles.
Always follow the manufacturer’s instructions carefully. Some products can damage grout or strip sealers if left on too long.
When you’re done cleaning, always rinse the grout thoroughly!
When Cleaning Won’t Fix Black Grout
If your grout still looks dark after plenty of scrubbing, the problem could be how the grout was applied.
One possible cause is thinset bleed-through.
Thinset is the adhesive used during tile installation. If too much was used or the excess wasn’t cleaned up well before grouting, black patches might show through.
Grout that was mixed with too much water or didn’t cure evenly may also develop dark blotches over time.
Frequent use of harsh chemicals is another culprit. Strong cleaners can degrade grout and cause permanent discolouration.
In these cases, using a grout pen or re-grouting is usually your best option.
How to Stop Grout From Turning Black
Once your grout is clean and fully dry, check if it needs resealing.
Just drop a bit of water on the surface — if it beads up, the sealer is still working. But if the water sinks, then you need to reseal the lines.
You can do this yourself or get a professional if you’re unsure.
Ideally, use a penetrating grout sealer. It can fill the grout pores and help prevent moisture and dirt from being absorbed. This makes ongoing maintenance much easier!
Grout usually needs resealing every 1–2 years, but always follow the manufacturer’s recommendations.
Aside from resealing, keeping the space well-ventilated makes a huge difference.
Switch on the exhaust fan whenever you use the shower or bathroom, and keep it running for 10–15 minutes afterwards.
Squeegeeing off the excess moisture on walls and floors helps surfaces dry faster, too.
Of course, cleaning your grout lines regularly is essential. It should be part of your routine, whether you’re cleaning tiles in the shower or tile floors in other parts of your home!
FAQs About Cleaning Black Stains on Grout
Still dealing with stubborn black stains? Here are answers to some common questions about cleaning and maintaining grout lines!
Can you use a magic eraser on grout?
Yes, but only for light surface stains.
Magic erasers work like very fine abrasives, so they physically scrub off dirt and grime from grout. However, frequent use can wear down the sealer or the cement, especially on old grout.
Always wet the eraser and the grout before scrubbing, and use light pressure to prevent damage.
Keep in mind that magic erasers won’t work on mildew, mould, or bacteria. For these issues, 3% hydrogen peroxide is usually more effective.
Can you steam clean blackened grout?
Yes — but keep in mind that it can damage your grout if you’re not careful.
Steam cleaners send heat deep into the grout pores, killing mould and softening hardened grime like grease or soap scum.
However, avoid steam cleaning entirely if your grout is unsealed or old. The high pressure can easily force water behind the tiles and cause the grout to crumble.
The same goes for natural stone tiles like marble, travertine, or slate. Too much heat can make the stone expand and contract, which can cause cracks.
Once you finish, check if the black patches are completely gone. If stubborn stains remain, you’ll need a follow-up treatment like 3% hydrogen peroxide.
Lastly, check if the grout needs resealing afterwards, as high heat can strip the sealer.
Why does grout turn black again after cleaning?
This usually happens when the underlying cause wasn’t fully removed.
Fungal roots and tiny spores can hide deep inside the grout pores, even after a thorough clean. If your bathroom is constantly damp or doesn’t get enough ventilation, mould and mildew will just pop right back up.
In the kitchen, grease stains build up on your tiles and grout each time you cook. On top of that, dirty mop water or hard water minerals easily re-stain grout lines.
Regular cleaning, better ventilation, and resealing your grout help prevent all of these from coming back.