
Let’s face it. If you’re anything like us, you can’t start your day without a fresh cup of coffee. Whether it’s to wake up properly or to feel like we can take on the world, coffee is essential.
While there are many types of coffee makers to choose from, the simplest and most reliable one is the drip coffee maker.
How Does A Drip Coffee Maker Work?
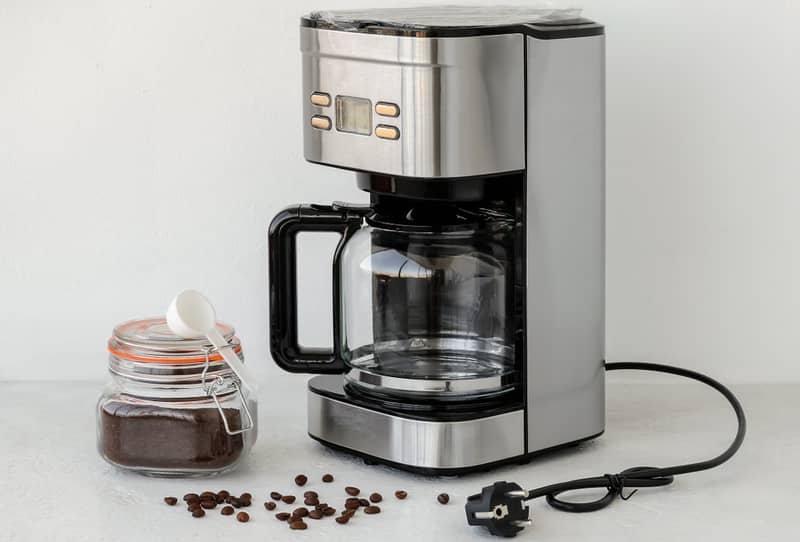
A drip coffee maker is a popular kitchen appliance that uses a simple yet ingenious mechanism to brew fresh, flavourful coffee. It typically comes with its own coffee pot or set of cups.
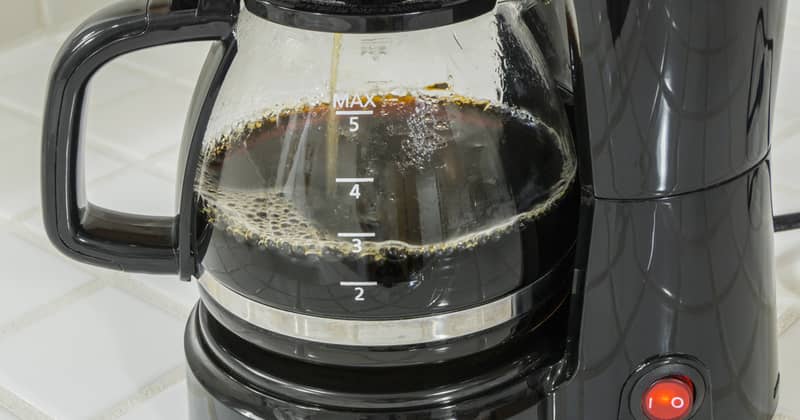
At the heart of its brewing process is a dripper, consisting of a series of narrow openings at the bottom of the filter basket. As water is heated in the machine’s brew basket, it flows down into the dripper and into the gaps. Pores at the bottom of the dripper allow some of the water to seep through, while others are blocked by hot ground coffee grounds.
As this process continues, a steady stream of hot water is released over the ground coffee and passes through into the glass coffee pot below. This system allows for complete control over brewing time and temperature, resulting in rich, aromatic coffee with every brew.
Your brewing cycle depends on your choice of coffee grounds and the number of cups you’ll need. Typically, you use 2 tablespoons of ground coffee for 1 cup. If you want a full pot, just multiply the above formula by 4 – 8 spoons of ground coffee.
How Often Should I Clean A Drip Coffee Maker?
Just like with a French press – ideally, you should clean your drip coffee maker after each use. That means at least washing the filter basket and the coffee pot and ensuring that the water tank is clean and clear.
The reason is that you want to have a fresh, clean cup of coffee every morning. Also, leaving used coffee grounds in the filter basket makes it easy for mould to proliferate. Yikes!
How To Clean A Drip Coffee Maker
So, let’s get to it. Below we have 5 simple steps for how to deep clean a coffee maker. All you need to do before you start is to gather the following supplies:
- White vinegar and water solution – equal parts white vinegar and water
- Microfibre dish towel
- Clean water
In case you haven’t done it already, dump your used coffee grounds into the sink. Or, if you’re growing some plants, toss the used grounds in the garden to enrich the soil.
Ready to clean your coffee machine? Here we go.
1. Unplug the coffee maker and remove the water reservoir
Your first step to clean your coffee maker is to take it apart. Be sure to unplug the coffee machine, so you won’t get zapped in the process.
The drip coffee maker is made up of the following removable parts:
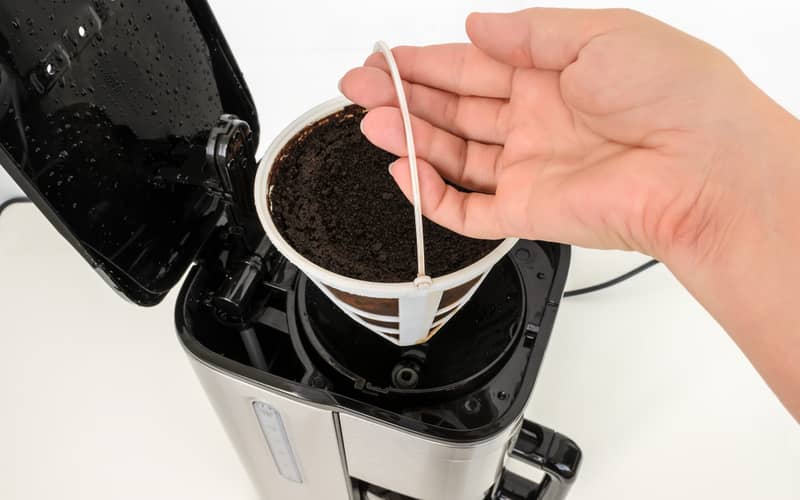
- Brew basket (this holds your filter basket and it’s also where water passes through to do the brewing process)
- Filter basket (this is where you put the coffee grounds or beans)
- Water reservoir or water chamber
- Coffee pot or carafe
While there are coffee makers with dishwasher-safe parts, we wouldn’t recommend using a dishwasher for your drip coffee maker because cleaning it by hand isn’t difficult.
2. Clean the water reservoir
The water reservoir in your drip coffee maker is either fixed or removable. The good news? They’re both manageable to clean!
How to clean a fixed water reservoir
Cleaning a fixed water reservoir means being creative. Since you can’t remove it, fill it with the white vinegar and water solution. Then let it sit for an hour and run a complete brew cycle. Refill the water tank with fresh water and repeat the process to get rid of the vinegar solution.
This step offers a deep clean and ensures that all the parts you can’t see are thoroughly cleaned. This way, you’ll clean any mineral buildup, coffee residue and remaining vinegar solution.
How to clean a removable water reservoir
You can clean a removable reservoir like you would a coffee pot. Hand wash it with mild dish soap, rinse well and dry it thoroughly.
Be sure to wipe it dry before reinstalling it to your coffee machine. Next, fill the reservoir with warm water and run a brew cycle. Wait for the carafe to fill up, then toss the used water into the sink. This last step ensures your reservoir is clean of soap and is securely attached to the machine.
3. Remove the brew basket and soak it in white vinegar for 30 minutes
You can do this while you clean the water tank. Your coffee maker’s brew basket can be hand washed with soapy water and rinsed with fresh water.
Alternatively, you can remove more coffee residue and mineral deposits by soaking it in a white vinegar and water solution for 30 minutes. This part of your coffee maker may have screws and other metal bits that won’t do well if they’re left to dry on their own. So, be sure to rinse it out with clean water when you’re finished and wipe it dry.
4. Wash the coffee pot with warm water and wipe it dry
As tempting as it is just to chuck it in the dishwasher and let the machine do the cleaning, it won’t bode well for your coffee pot. This is the most delicate piece of your coffee maker, so clean it carefully.
Fill your sink with water and mix some mild dish soap. Place the coffee pot in the sink with soapy water, and gently scrub the carafe with a sponge to remove any coffee oils and bacteria. Because used coffee grounds are damp and warm, bacteria and mould will quickly grow if you let it sit for the rest of the day.
Your coffee maker will be lost without its dedicated carafe, so be careful when wiping it dry. I recommend using a microfibre cleaning cloth for drying glass kitchen supplies.
5. Reassemble the coffee maker and run a complete cycle
When all the removable parts are clean and dry, it’s time to put your coffee maker back together. Place the brew basket back in its rightful place, followed by the filter basket. Next, replace the water reservoir and check that its contact points with the machine are dry. Wipe the body of your coffee maker with a clean microfibre cloth to remove any dust.
After you’ve returned the removable parts, check that your coffee maker is working. You will need to clean out any vinegar residue, so your next step is to fill the reservoir with plain water. Run a full cycle and a second cycle if necessary.
Finally, you are done cleaning your coffee maker. You can rest assured that your next cup will fill you with the warmth and pleasant flavour of caffeine.
Let Your Worries Drip Down The Drain
Cleaning your drip coffee maker should be as easy as brewing coffee. It only takes a few simple steps and some time to clean it. So, keep your drip coffee machine clean to continue making freshly brewed coffee every morning for years to come.
If you’re pressed for time or need extra help, you can always let professional cleaners take care of cleaning the rest of your kitchen. Knowing when a task is too much is the first step to having a cleaner and tidier home that works best for you.